
Soil blocks are a great technique for getting a heap of seedlings started without pots. The basic concept is that you make blocks of soil with a mold and then plant seeds into the block, and raise the seed to seedling size.
When you’re ready to transplant the seedling to your garden, you simply plant the whole soil block – no transplant shock, no shaking out of pots… just pop it in the garden and there you go…

Soil blockers are nifty little contraptions that come in a range of sizes… the one we have is suitable for a small market garden, but you can get smaller ones for domestic use. They do cost, but to us they’re a sound investment.
** 13th April 2012 update! Allsun Farm once again stock soil blockers for the Aussie market! Hooray!
We bought our Ladbrooke soil blocker online from the UK and the service was great.
The mix we use currently to make soil blocks at Milkwood Farm is as follows:
2 parts Coco-peat (comes in a dried and pressed block)
1 part Course sand (washed)
1 part Compost
1 part Mushroom compost (if you can get it – ordinary compost if not – we use our home made which is not quite as soil like as the commercial stuff)
1 part Worm castings
Mix it all together and proceed to soil block as shown below. The exact consistency of the mix can be varied with a little water… experiment until you get it right…
You will find a different recipe in Eliot Coleman’s The New Organic Grower p.140

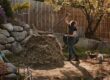
Stephen mixes the ingredients


Mixing up the ingredients with a little water

Soil block time!


Seeds go into the depression on each soil block, then are covered over


Better than lamingtons...

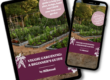
Soil blocked spinach germinating

Soil blocked spinach seedlings ready for transplanting...
We’ll do a ‘how to soil block’ video shortly but for now, that’s the gist of it. Pretty funky planting technique, eh?
The students in the above images were attending the Starting an Organic Market Garden courses we’ve run at Milkwood Farm over this summer.
Big thanks to Joyce and Mike from Allsun Farm for their ongoing mentorship with our market garden project at Milkwood Farm. Also big thanks to Stephen Couling for sharing his secret soil block mix.


Definitely pretty funky :). Looks like a great idea
Little mud brick (or is it rammed earth/media?) homes for seedlings 🙂
THAT is wonderful. Thanks so much!
http://www.soilblocker.com.au/
It is 90% confirmed that we will have the first shipment here in 8-10 weeks. Thank you all for the amazing interest in the product we look forward to helping you all.
Visit http://www.soilblocker.com.au/ and subscribe so that we can keep in touch about availability.
I usually use small disposable plastic glasses for this purpose. This is new for me and I shall try in future. Best regards and thank you very much for the post on this excellent practical device named ‘soil blocker’.
I love my soil blocker. It’s such a quick and easy way to germinate seeds and plant them out.
Here’s the recipe I use (very similar to yours above):
http://green-change.com/2010/03/26/soil-blocker-recipes/
http://www.Soilblocker.com.au is now fully stocked and we would like to offer all the Milkwood community a special coupon for 10% off. Just type in “milkwood” to get 10% off our already lowest prices on all soil blockers. Thank you again for your great support. This offer will expire soon so be quick.
You guys make it all high-tec, meanwhile in Xochimilco, Mexico City, people has had a very different tecnique for centuries. Anyways, thanks for sharing your experiences, it’s motivating me to do great changes in my garden… 😀
Have you been able to source some local coco-peat? When I bought some at the local permie nursery I found it come imported from Sri Lanka. Can you think of a local alternative?
Which one exactly did you get from Ladbrookes here in the UK please?
Would you get the same one or a bigger/smaller one?
I will get one or two whilst here. Got some birthday money left over from my 50th on Sunday. I can ship it in the container when we move back later this year.
Thanks for the info in advance
We got the bigger one, but we’re a market garden 🙂